Learn how to draw a dog with this easy, step-by-step guide for beginners! Follow along to create a cute cartoon dog or a realistic canine sketch using simple shapes and lines.
Unleash Your Inner Artist – Learn How to Draw a Dog!
Dogs are beloved companions, known for their loyal eyes, wagging tails, and endless personalities. It’s no wonder that countless aspiring artists want to capture their charm on paper. If you’ve ever wondered how to draw a dog, you’ve come to the right place!
This comprehensive, step-by-step guide is perfect for beginners. We’ll start with simple shapes and gradually add details, making the process easy and fun. By the end, you’ll have the skills to draw a dog that looks great, whether you prefer a cute cartoon style or a more realistic approach.
Grab your pencil and paper – let’s get started!
Essential Supplies You’ll Need
Before we dive in, gather these basic drawing tools:
- Pencil: A standard HB or 2B pencil is great for sketching.
- Eraser: A good quality eraser is crucial for cleaning up mistakes and refining lines.
- Paper: Any sketch paper or even printer paper will do.
- Reference Photo (Optional but Recommended): Having a picture of a dog you admire can inspire your drawing and help with details.
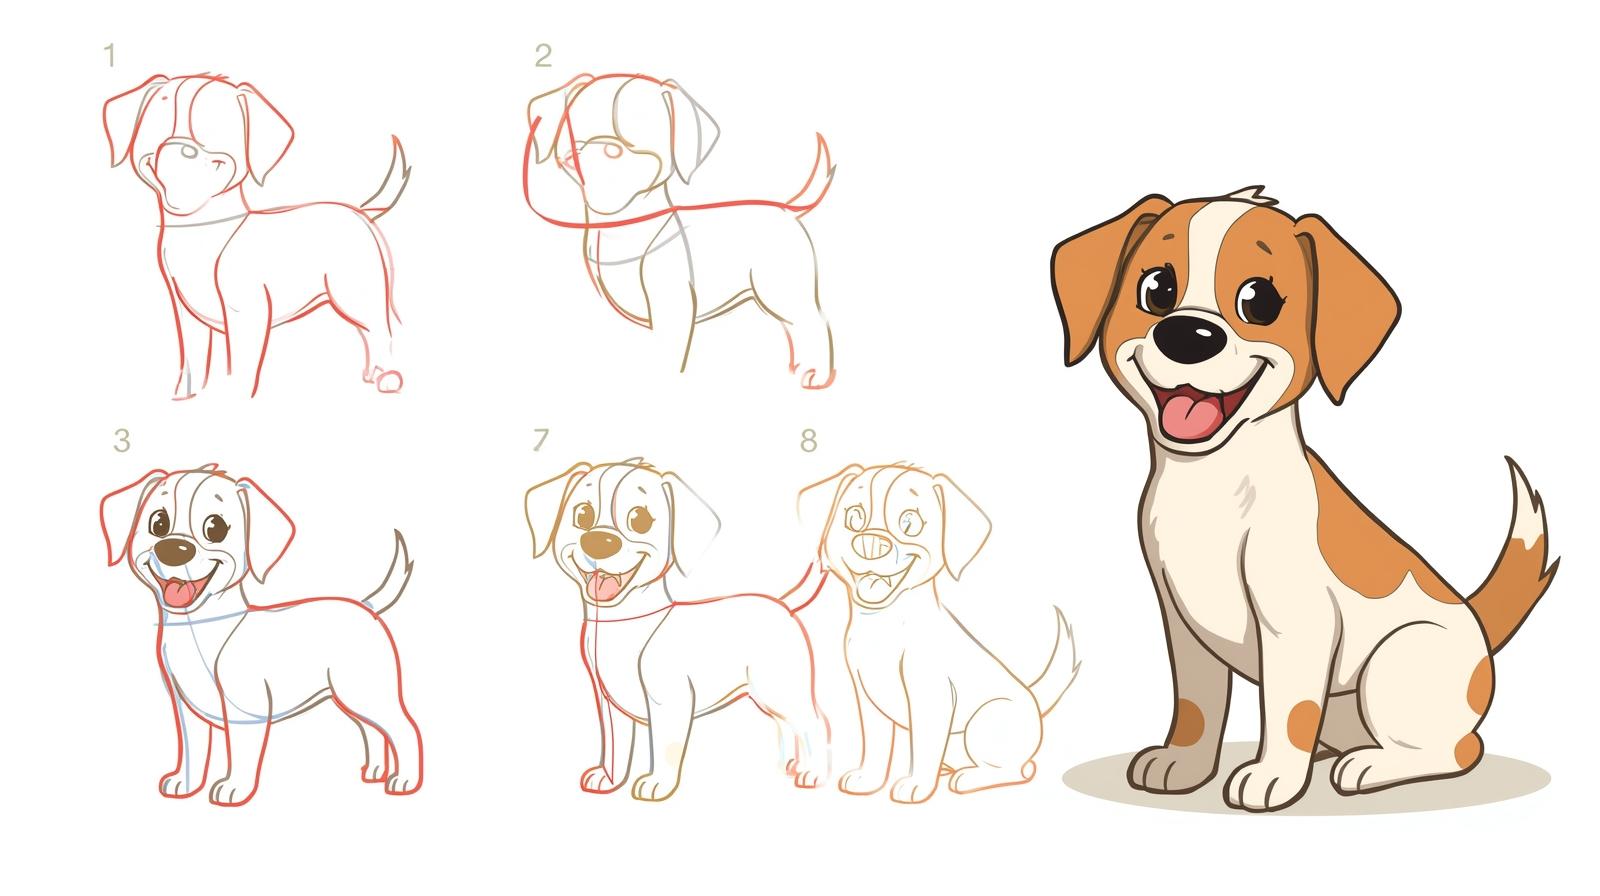
Part 1: How to Draw a Dog – The Cartoon Style (Easy Step-by-Step)
Let’s begin with a charming, easy-to-draw cartoon dog. This method uses fundamental shapes to build your drawing.
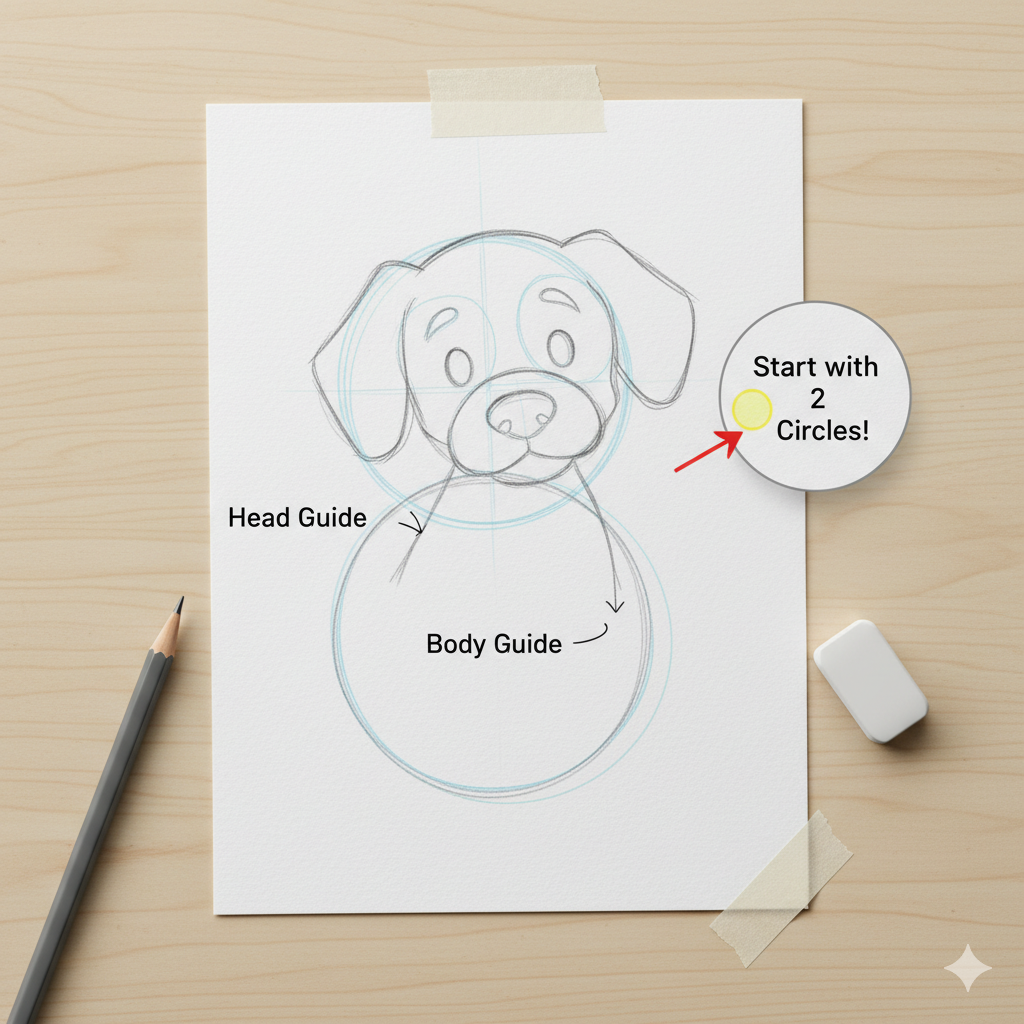
Step 1: Basic Shapes for the Head & Body
Start by lightly sketching two overlapping circles. One larger circle for the body and a slightly smaller one for the head. Think of them as the foundation for your easy dog drawing.
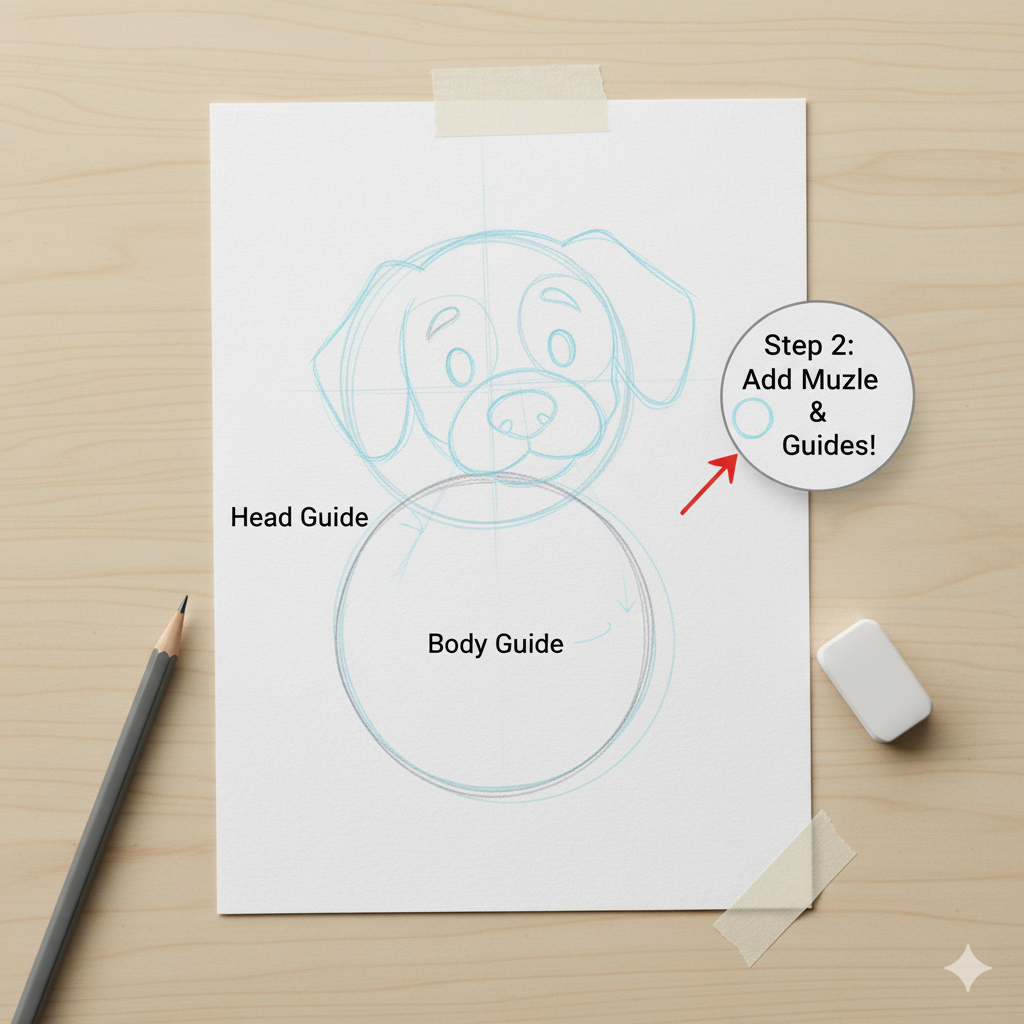
Step 2: Add the Muzzle and Ear Guides
On the head circle, draw a smaller oval for the muzzle. For the ears, sketch two curved shapes on either side of the head. These don’t need to be perfect yet; they’re just guides.
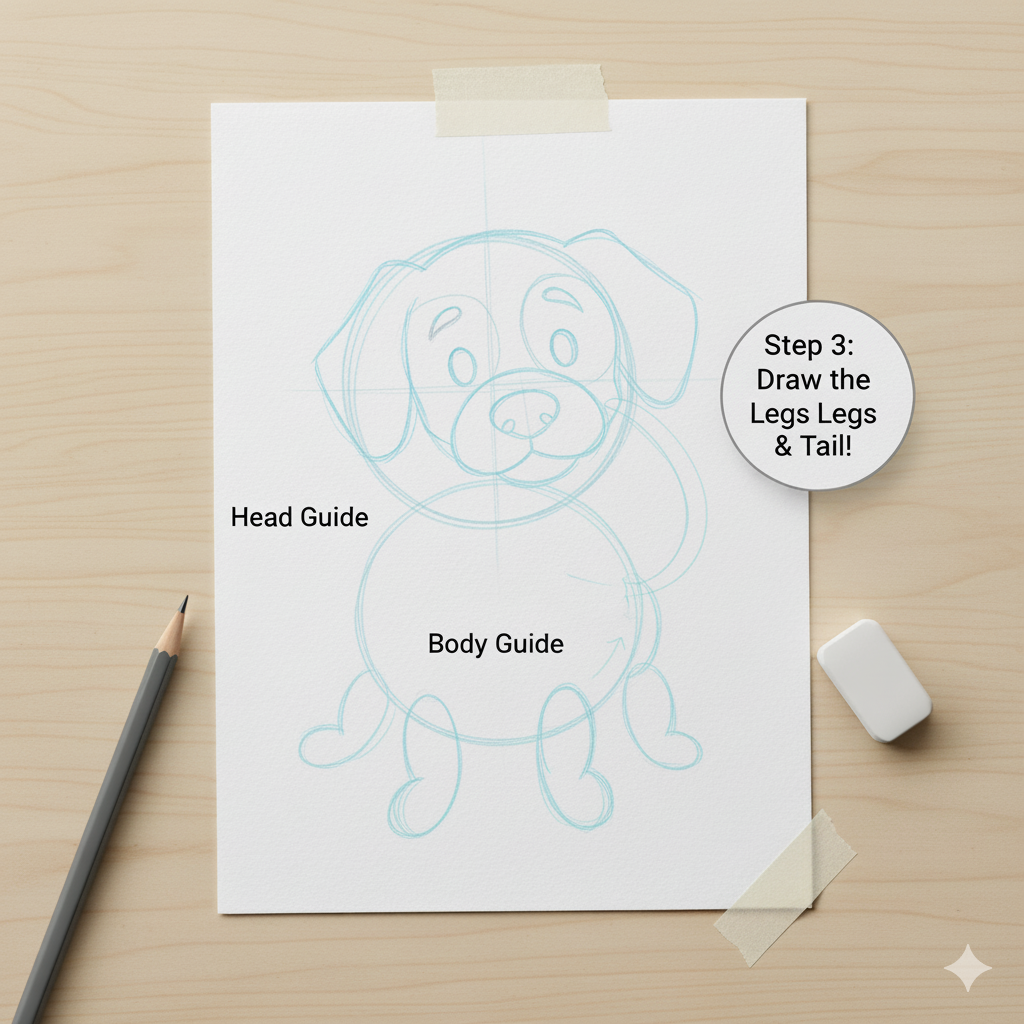
Step 3: Draw the Legs and Tail
From the body circle, sketch out four simple oval or rectangular shapes for the legs. Don’t forget a curved line for the tail! Keep these loose and light.
Step 4: Refine the Outline and Add Features
Using your guide shapes, start drawing the final outline. Connect the head and body with a curved neck line. Give your dog eyes, a nose (a rounded triangle works well), and a smiling mouth. Use solid lines for the fur, paws, and any floppy ears.
Step 5: Erase and Ink
Carefully erase the original guide circles and ovals. Once only the final lines remain, go over them with a darker pencil, pen, or marker. Add small details like toes, a collar, and little patches of fur. You now have a finished, adorable cartoon dog drawing!
Part 2: Realistic Dog Drawing Steps (For a More Detailed Sketch)
To learn how to draw a dog with a more lifelike appearance, we’ll focus on proportion and structure using simple boxes instead of circles.
Step 1: The Block Foundation
Lightly sketch a rectangular box for the chest and ribcage (the front section of the body). Draw a smaller, slightly tilted box behind it for the hindquarters. Connect these two boxes with a slightly curved line representing the spine.
Step 2: Head and Neck
Draw a wedge shape for the head and connect it to the chest box with two parallel lines for the neck. The muzzle should be an extension of the head, drawn as another smaller box or cylinder.
Step 3: Limbs and Joints
Think of the dog’s legs in three segments: shoulder/hip, upper leg, and lower leg. Draw circles or ovals for the joints (like the elbows and knees). Sketch simple sticks or lines between the joints to establish the dog’s pose and proportions. This prevents the dog from looking stiff.
Step 4: Defining the Form and Fur
Now, soften all the sharp box edges into natural, muscle-and-bone curves. Draw in the paws, tail, and facial details, paying close attention to the eyes and nose placement. Use short, fine lines along the body’s outline to suggest the texture of fur, avoiding heavy, solid lines.
Step 5: Shading and Depth
Shading is key to realism. Identify your light source and add darker tones to areas that would be in shadow, such as under the jaw, where the legs meet the body, and inside the ears. This gives your realistic dog sketch depth and makes it pop off the page.
More Dog Drawing Ideas and Practice Tips
Want to level up your dog drawing ideas? Try these next steps:
- Practice Different Breeds: Once you master the basic structure, practice drawing specific breeds—a long-muzzled Collie, a flat-faced Pug, or a fluffy Poodle. The foundational shapes change slightly, but the method remains the same.
- Focus on the Eyes: The eyes are the soul of the dog. Spend time studying how the catchlights (small white reflections) make the eyes look wet and alive.
- Draw a Puppy: Want to draw a puppy? Focus on making the head slightly larger in proportion to the body and drawing extra-large paws and ears for that cute, clumsy look.
Conclusion: Keep Practicing!
Learning how to draw a dog takes time, but every line you draw is progress. Remember to start light, use simple shapes, and only commit to darker lines when you’re sure of your form. Now that you know the steps for both a cartoon and a realistic sketch, the only thing left is to keep your pencil moving! See other reviews!